How to build a Fray Car (Fray 06 Update) by Tom Bowman
It's time to get ready for the annual trek to Ferndale for the biggest T-Jet race in the world, THE FRAY!
I get excited thinking about all the work the needs to be done prior to getting on that plane. The first step
is to build up a bunch of cars. The team can enter 15 cars this year. We need more than that with all the
practice to be run in the days leading up the actual event on February 11th.
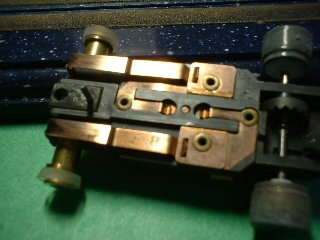
Another reason for me to revisit this subject, is all the new parts and tools that are available this year. That changes
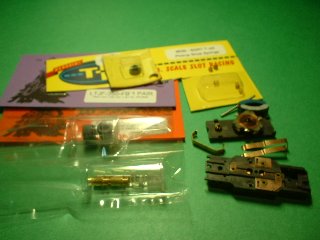
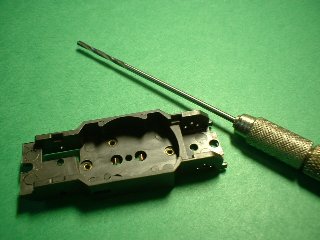
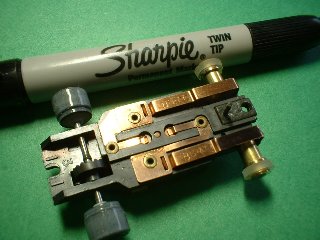
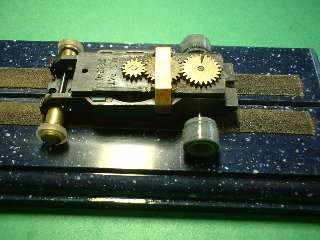
the way some procedures are done, and hopefully will result in faster cars. Shown above is the parts needed to build a
Fray car. There are other parts available, but this is typical of what most of my cars will be running this year. The
front end set is the new Wizzard FR-54B. This set has a bigger axle than the classic original Wizzard brass front end set.
The rear silicone sponge tires, are the Wizzard "Fray Cut" that the Socal and East Coast teams ran last year. Racing does
improve the breed!
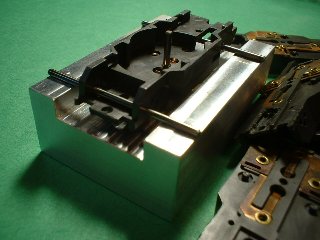
Jim Walters came out with a block for checking the straightness of chassis. This is a valuble tool, which allows you to check
all of your chassis to find the really good, flat ones. I was surprised on how few good ones I had!
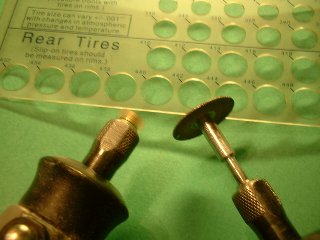
Ther FR-54B's come with .325 clear vinyl tires. The Fray limits front tires to .300 minimum size, so we will sand down the stock ones to get to the limit.
I chuck one tire and wheel in a Dremel and use a Harbor Freight diamond coated cutting disk in another Dremel. I like
to cut the tire at an angle to lessen friction. Use your tire guage frequently, so you don't cut too much!
Here we have the tire down to the .300 limit, do the other tire to match.
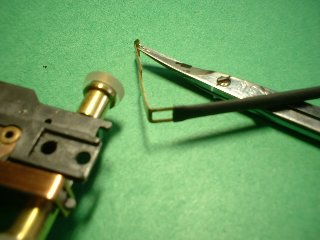
Here we take an .068 reamer, available from Wizzard, to open up the armature hole. Also ream
out the hole that the cluster gear shaft rides in.

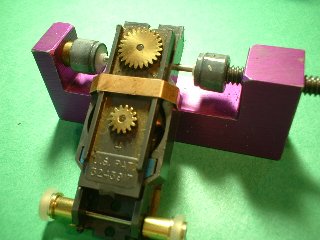
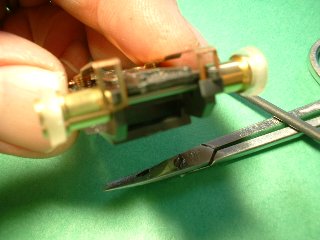
Here we tighten the chassis rivets, using a took from SCM's Blue Print Kit. These tools are very handy, currently email scmperformance@kc.rr.com
for info on availability. The reason for tightening the rivets, is that you can lose speed if the pickup hangers get cockeyed!
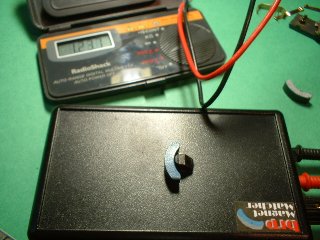
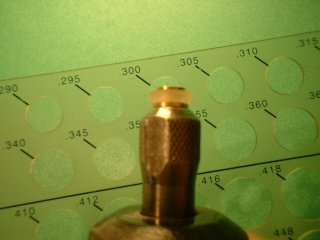
This year only JL magnets are allowed, no Super II or AFX magnets need apply. JL magnets are very consistent, but if you want to match them, for the extra bit of speed...use the brp Magnet Matcher.
JL magnets need usually to be sanded to fit the T-Jet chassis. Don't sand too much, as the limit is .700 determined by a special plug. JW is now offering this new tool, so you can check yourself.
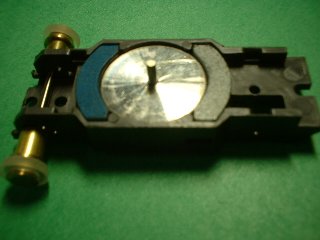
brp offers the .0635 drill blank axle and Larry Thomas' Black Magic crown gear (no longer available) that you want to use to have a solid rear end. Here I'm using a stock Aurora crown gear, because I've already used
all of Larry's gears that I had. More are coming! Last year's building page showed the AFX Specialty Crown gear being used. Unfortunately that gear was not allowed to run at the Fray, and this
year's Fray rules set a .300 inch minimum size limit on crown gears. Yet another rule to limit my ingenuity! Smokey Yunick, move over I'm coming to join you!
Now we fit the rear tires, I don't press them on all the way though. We'll keep them out far enough so the next process doesn't wear off the silicone.
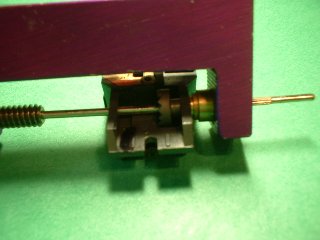
Let's put aside the chassis for a bit and work on the arm. Here's a new product from Larry Thomas, and exclusively available thorough brp. It's a tool for sanding the comm, and comes with various grades of sandpaper. Here's our selected arm, beforehand.
And after the treatment. I neglected to mention, that you want to select an arm with a flat comm and good electrical balance.
My previous article shows how to true, and balance the arm. Also using the SCM tools and various presses to get the gears fitted properly. RT Racing, JW also
have the presses that you can use for this. Kevin Crowe's Winning Edge is another source, but he doesn't have a website. Kevin does go to most major HO shows, so you can catch him there. Here I'm using the Dremel engraving tool to mark the location of the gears. After the bath, I'll use a Sharpie to the engraving marks.

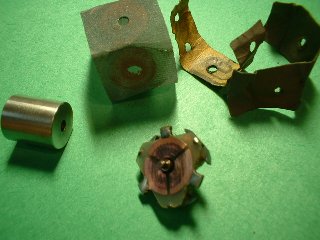
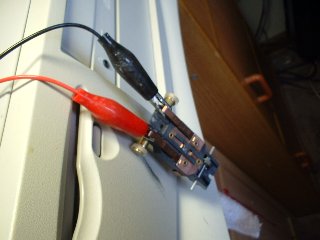
Here's my Frankenstein lab, for breaking in T-Jets. I'm using an old PC power supply to provide 12 volts DC. The leads are soldered to a spare hard drive connector inside the case. The tanks are the top part of a JL case. I have glued in plastic posts and threaded them.
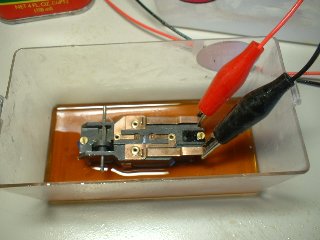
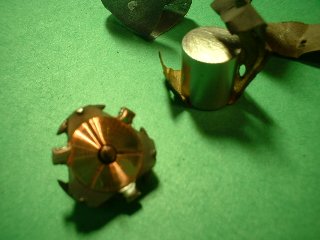
Earl Harris's classic article on T-jet gear lapping was the impetus for my lab. Earl's method is a little messy, and time consuming. I've tried using Semichrome in one tank and Brasso in the other. Here though, I'm using "cutting fluid" as the first step. Here I'm using a junk chassis setup, just to work on the gearplate and gears.
Be carefull and don't run the car more than 5 minutes in this stuff, It can burn up, if you go too long!
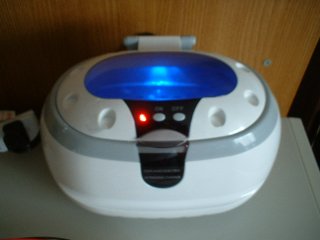
My new Harbor Freight ultra sonic cleaner is used to clean up the mess, prior to going to step two.
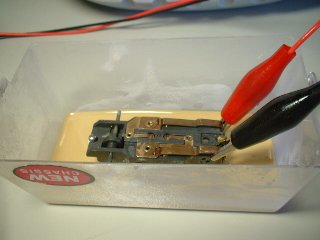
Tank two has Brasso in it, if you are an old military type like me, you'll have some around the house! I don't think you can hurt a car using this, but eventually enough gets on the motor to cause it to stop. Take it apart and put it in the ultra sonic cleaner.
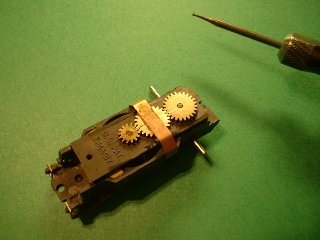
Now all clean and dry...and reinstalled in the race chassis. Lube the chassis with Larry Thomas H:OyL and let it rip for for 15 minutes to get everything working together.
After breakin, let's use 1/8" heat shrink tubing to restrict the BSRT 504 pickups. Cover the top of the hanger, then cut off the excess.
Here's the difference between restricted and unrestricted pickups. To start with, the pickup should be allowed to rise just above the top of the tire, as viewed from the side.
Adjust your shoes to be flat on your test track, then mark them with a Sharpie.
I'm using Slot Pro Speedway's Corian Shoe sander to true my shoes. This is a really nicely made, quality tool. Use a natural movement of the car, to sand down your pickups flat. This can take some time.
Here's what my shoes look like after a few minutes work. The goal is to sand off all the black from the Sharpie, getting a perfectly flat shoe. This helps handling and power from the track rail.
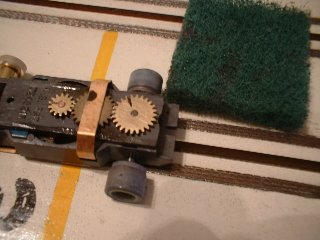
The last thing is to move the rear tires in to the legal limit, and use a Scotchbrite pad to scuff the tires. Carefully take the shine off, which breaks in the tires much faster than by running the car on the track. The JL guidepin is now legal for the Fray, so that makes it
easy to get the chassis working and make any final adjustments. The next item is the body, but that will be another article.
                                                                                 Best Racing,
                                                                                 Tom